About
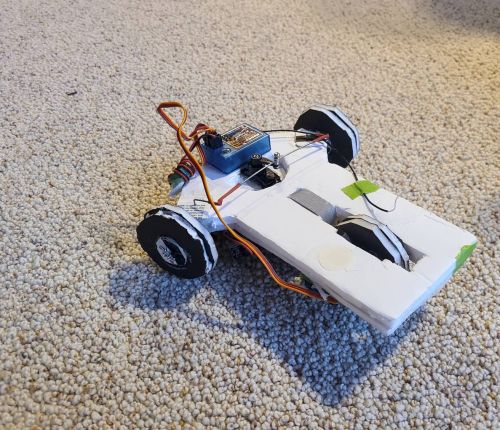
After watching FliteTest's DIY RC Car YouTube video, I decided that I wanted to build one. I searched all over but could not find any scratch build plans, so I decided to make some. I based the dimensions on frames that I captured from the video and referenced them with known dimensions. Using the template shared on this page, I was able to make a DIY RC car.
Materials
Parts
| Qty (Spares) |
Description |
|---|---|
| 3 | 9V Battery Connector (2x for car & 1x for transmitter) |
| 4 | 1300mAh USB-C lithium rechargeable 9V or standard 9V |
| 1 | RC Car TX/RX adapted for 9V |
| 1 | BEC 5V/6V with two parallel 9V battery connectors and 3-pin RX connector |
| 1 | Sheet of Dollar Tree foam |
| 2 | Velcro battery strap |
| 1 | Piano wire 1ft |
| 1 | Piano wire sleeve / stir straws |
| 6 | Linkage stoppers |
| 1 (2) | Standard servos |
| 1 (2) | Modified servos for continuous fast rotation |
| 1 (2) | Standard servo horn |
| 1 (2) | Round servo horn for wheel |
| 2 (4) | Servo horn screws |
| 1 | Old credit card |
| 3 | Rubber bands for extra traction |
| 10 | Small zip ties |
Tools
- Hot glue gun
- Drill
- Utility knife
- 2x Needle nose pliers
- Flush cutters for piano wire and zip ties
- File for piano wire
- Philips screw driver for servo horn and servo disassembly
- Servo tester
- Small drill bit set
- Small cutting matt
- Ruler for straight cuts
- Lighter for heat shrink
Consumables
- Blue tape for protecting servos from hot glue
- Isopropyl alcohol for removing hot glue
- Super glue
- Car templates (print a few)
- Heat shrink
- Hot glue
Build
Assembly Notes
- Reinforcement Plates
- Reinforcement Plate hole should be spaced about 1/4 inch from the edge of the body
- Top and bottom plates should be aligned
- Steering Push Rod
- Put 90 degree bend in push rod at 1.5 inches
- Stick the push rod through the two reinforcement plates from the bottom to the top
- Push it all the way through then take a pair of needle nose pliers clamp it at the base at the top of the frame
- Put a 90 degree bend in the push rod wire towards the rear of the car, while making sure that the 1.5 inch portion of the push rod is sticking straight outwards of the frame
- Make a heat shrink spacer to space the wheels on the front frame away from the sides of the frame by at least 1/4 inch. This will allow the wheels to move around and turn without catching on the chassis.
Setup Notes
- Until RC trims have been set, only power car while its back wheel is not in contact with the ground
- Test before adding any rubber bands to wheels for traction
- Use dual rates for limiting speed
- Use expo for smoother steering
- Only add second 9V in parallel to BEC if car pulls too much current for one 9V battery
- Switch BEC to 6V for extra speed
- Most 9V connectors are 24 Gauge which are good for ~1A (at 9V)
FliteTest Resources
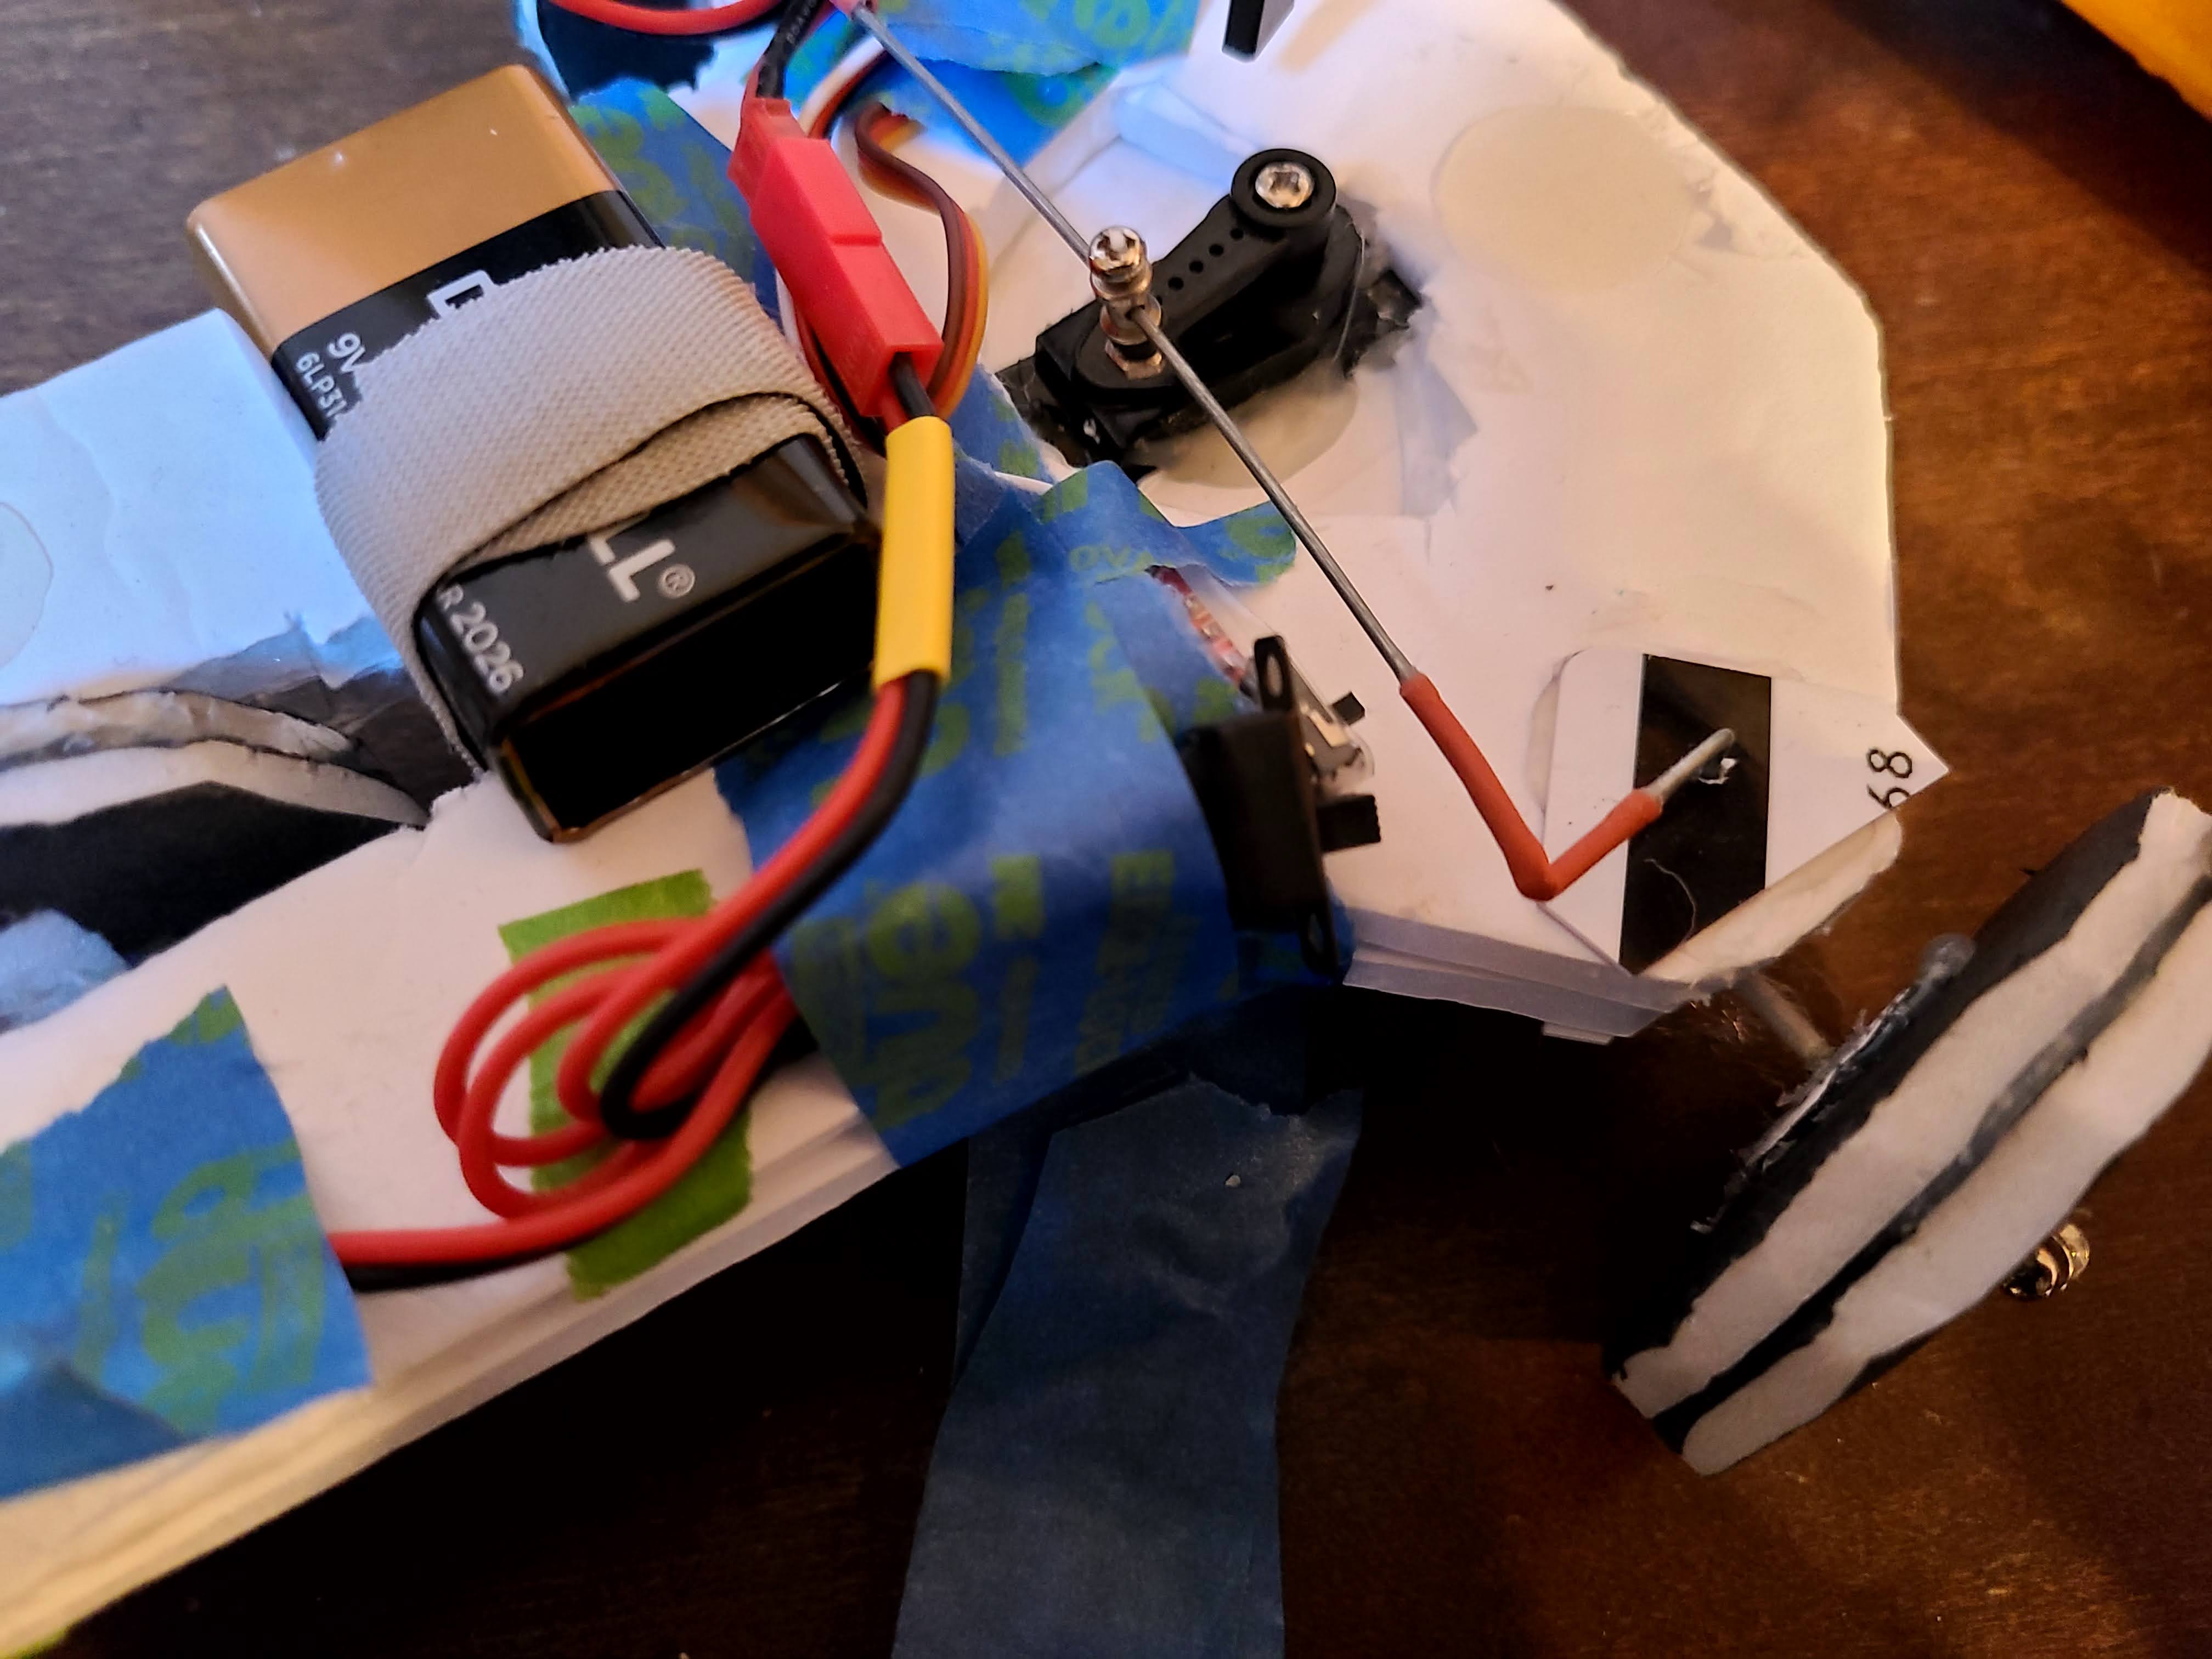
Post Build Notes
Battery
Running the DIY RC car on a 9V battery is easy because 9V are common but the car drains them quickly. With a single standard 9V the car will probably last less than 15 minutes. Using two protected lithium ion cells in series would be a better solution.
Continuous Rotation Servo
Modifying cheap Hextronix servos for continuous rotation was difficult. For my first attempt, I followed the directions from the FliteTest video. Initially the servo worked well and spun quickly, due to the glued gears. Unfortunately, after some use the servo would start buzzing, as if the gears were bound up, and stop working. After sitting for a bit it would start working again. For my second attempt, I glued the potentiometer in place and drilled out the servo's plastic output shaft so that it could spin freely (without interfacing with the potentiometer). This spun much slower than the first but it did work consistently.
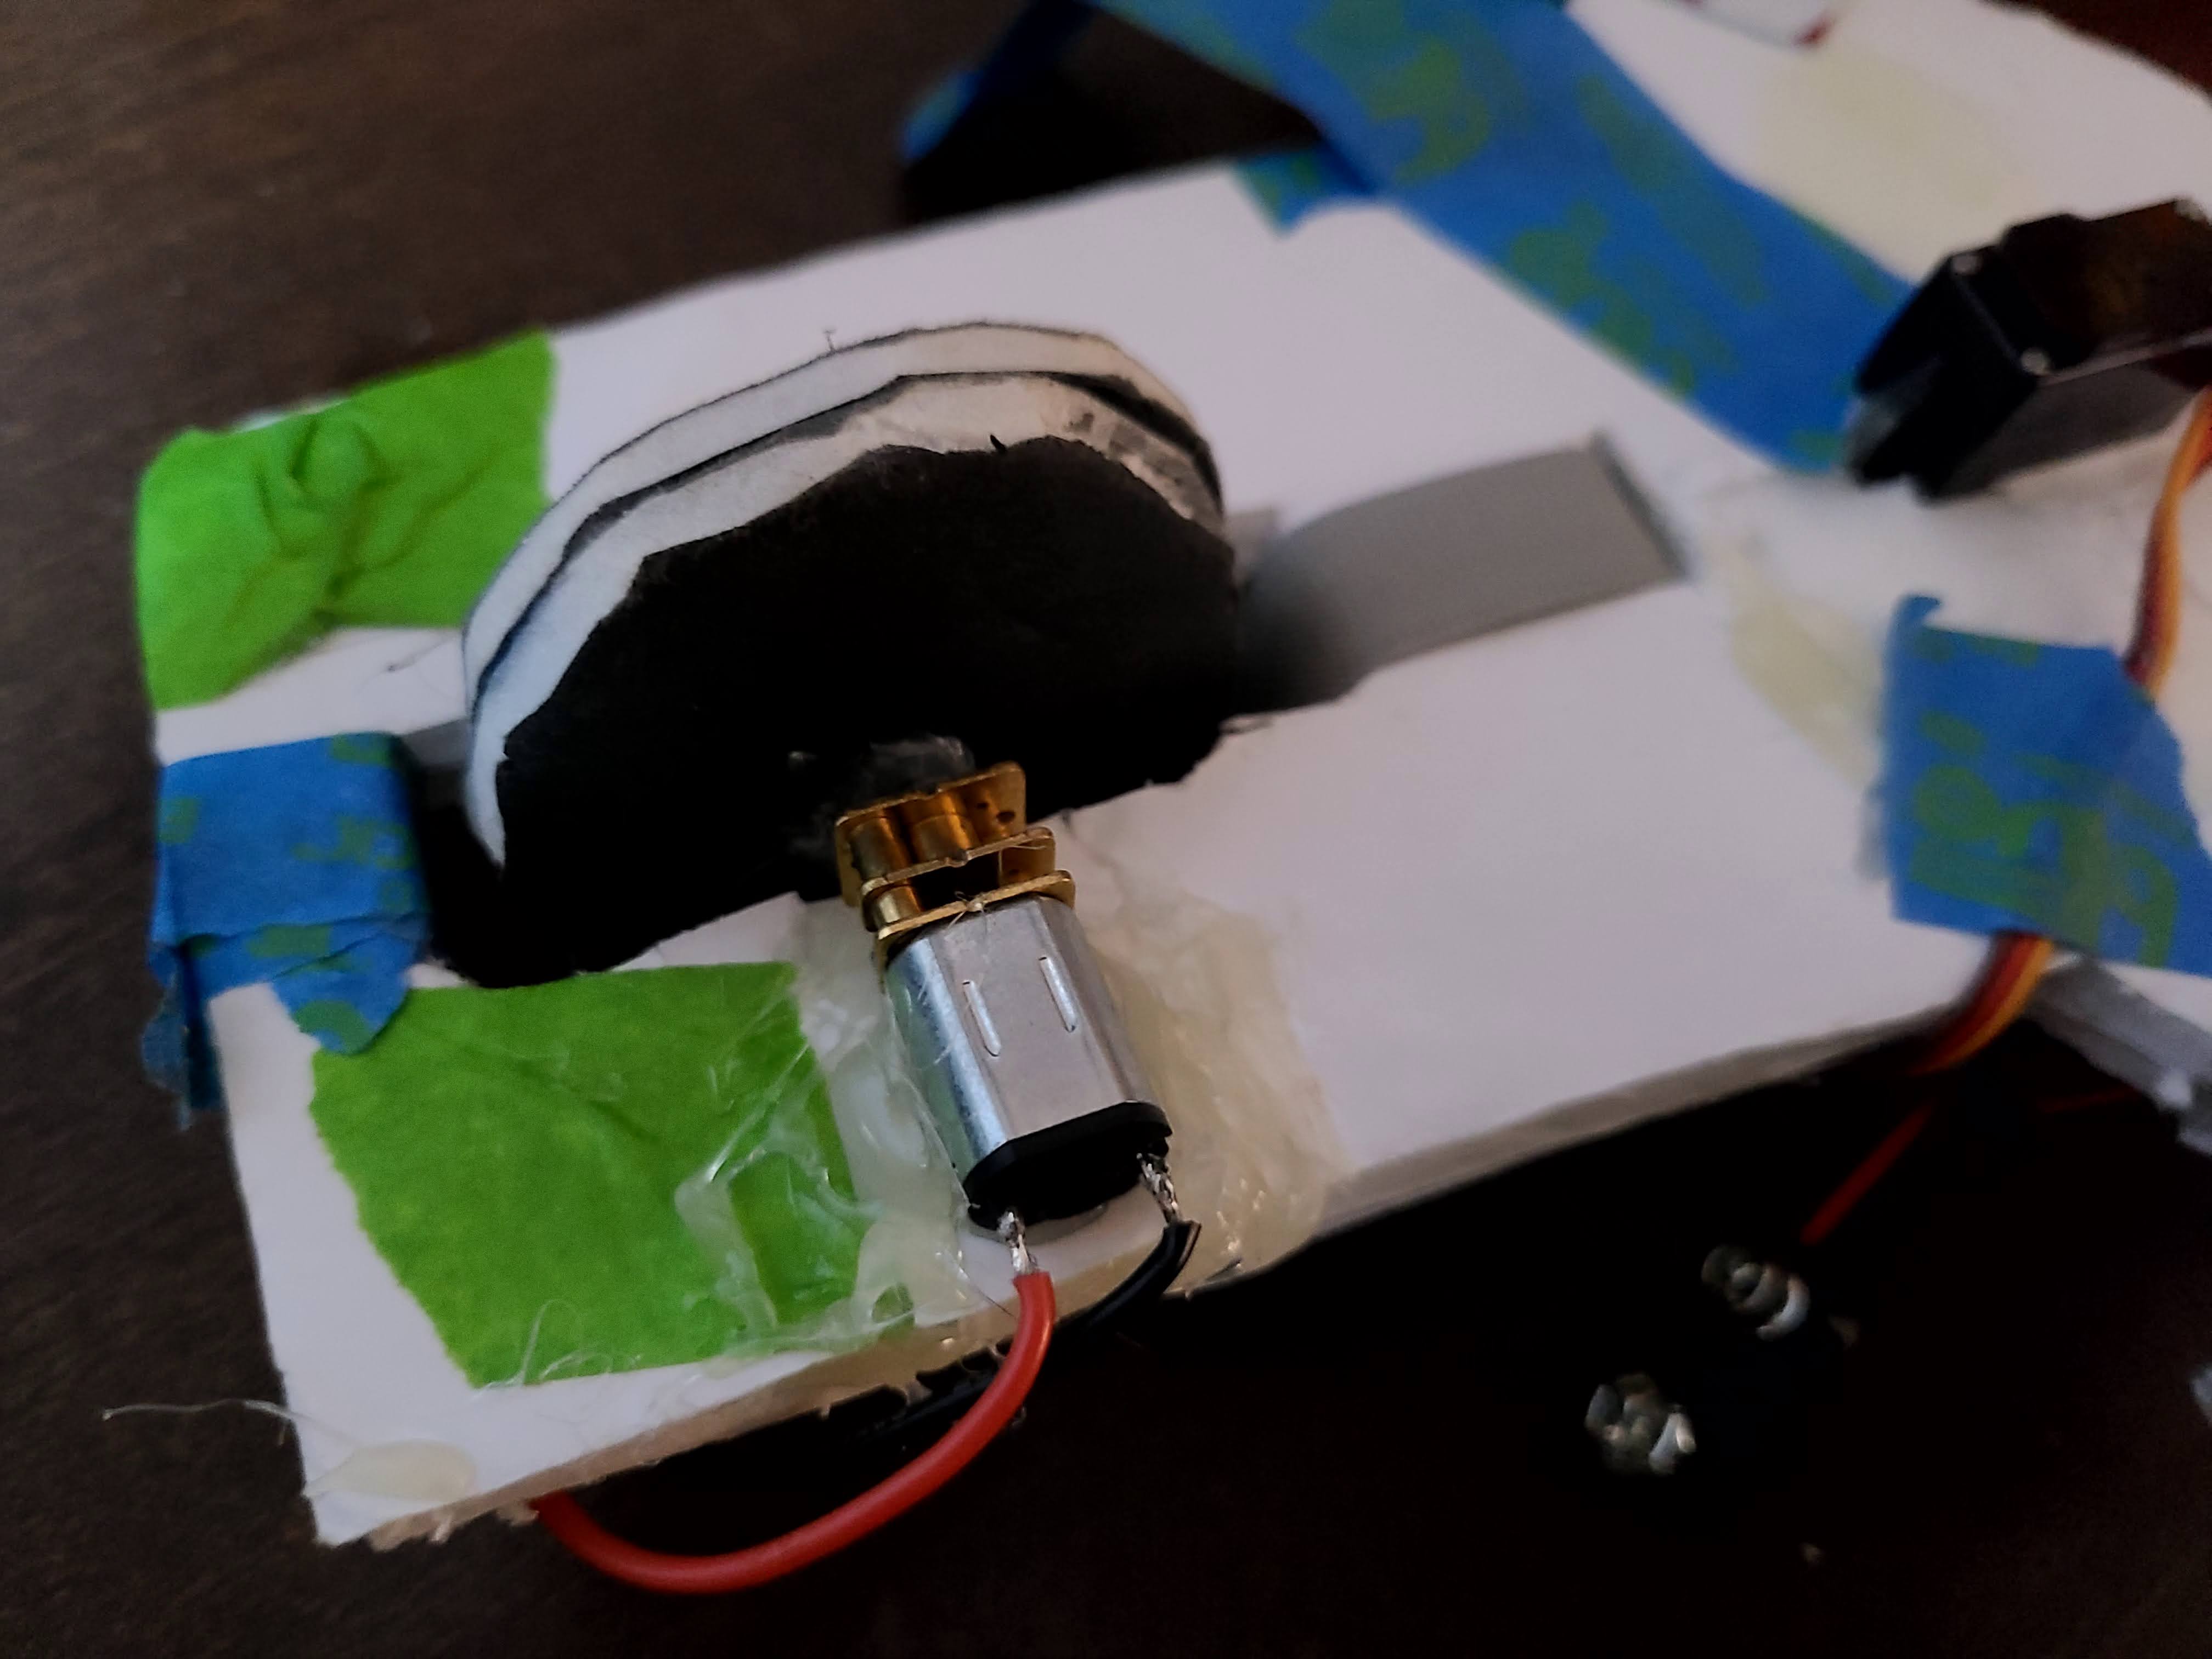
The continuous rotation servo is a bad hack and I strongly recommend using a cheap DC motor and speed controller instead. The cheap DC motor also uses less power than the continuous rotation servo.
| Qty | Description | Cost |
|---|---|---|
| 1 | 12V 1000RPM N20 Mini Micro Metal Gear Motor with Gearwheel DC Motors | $4 |
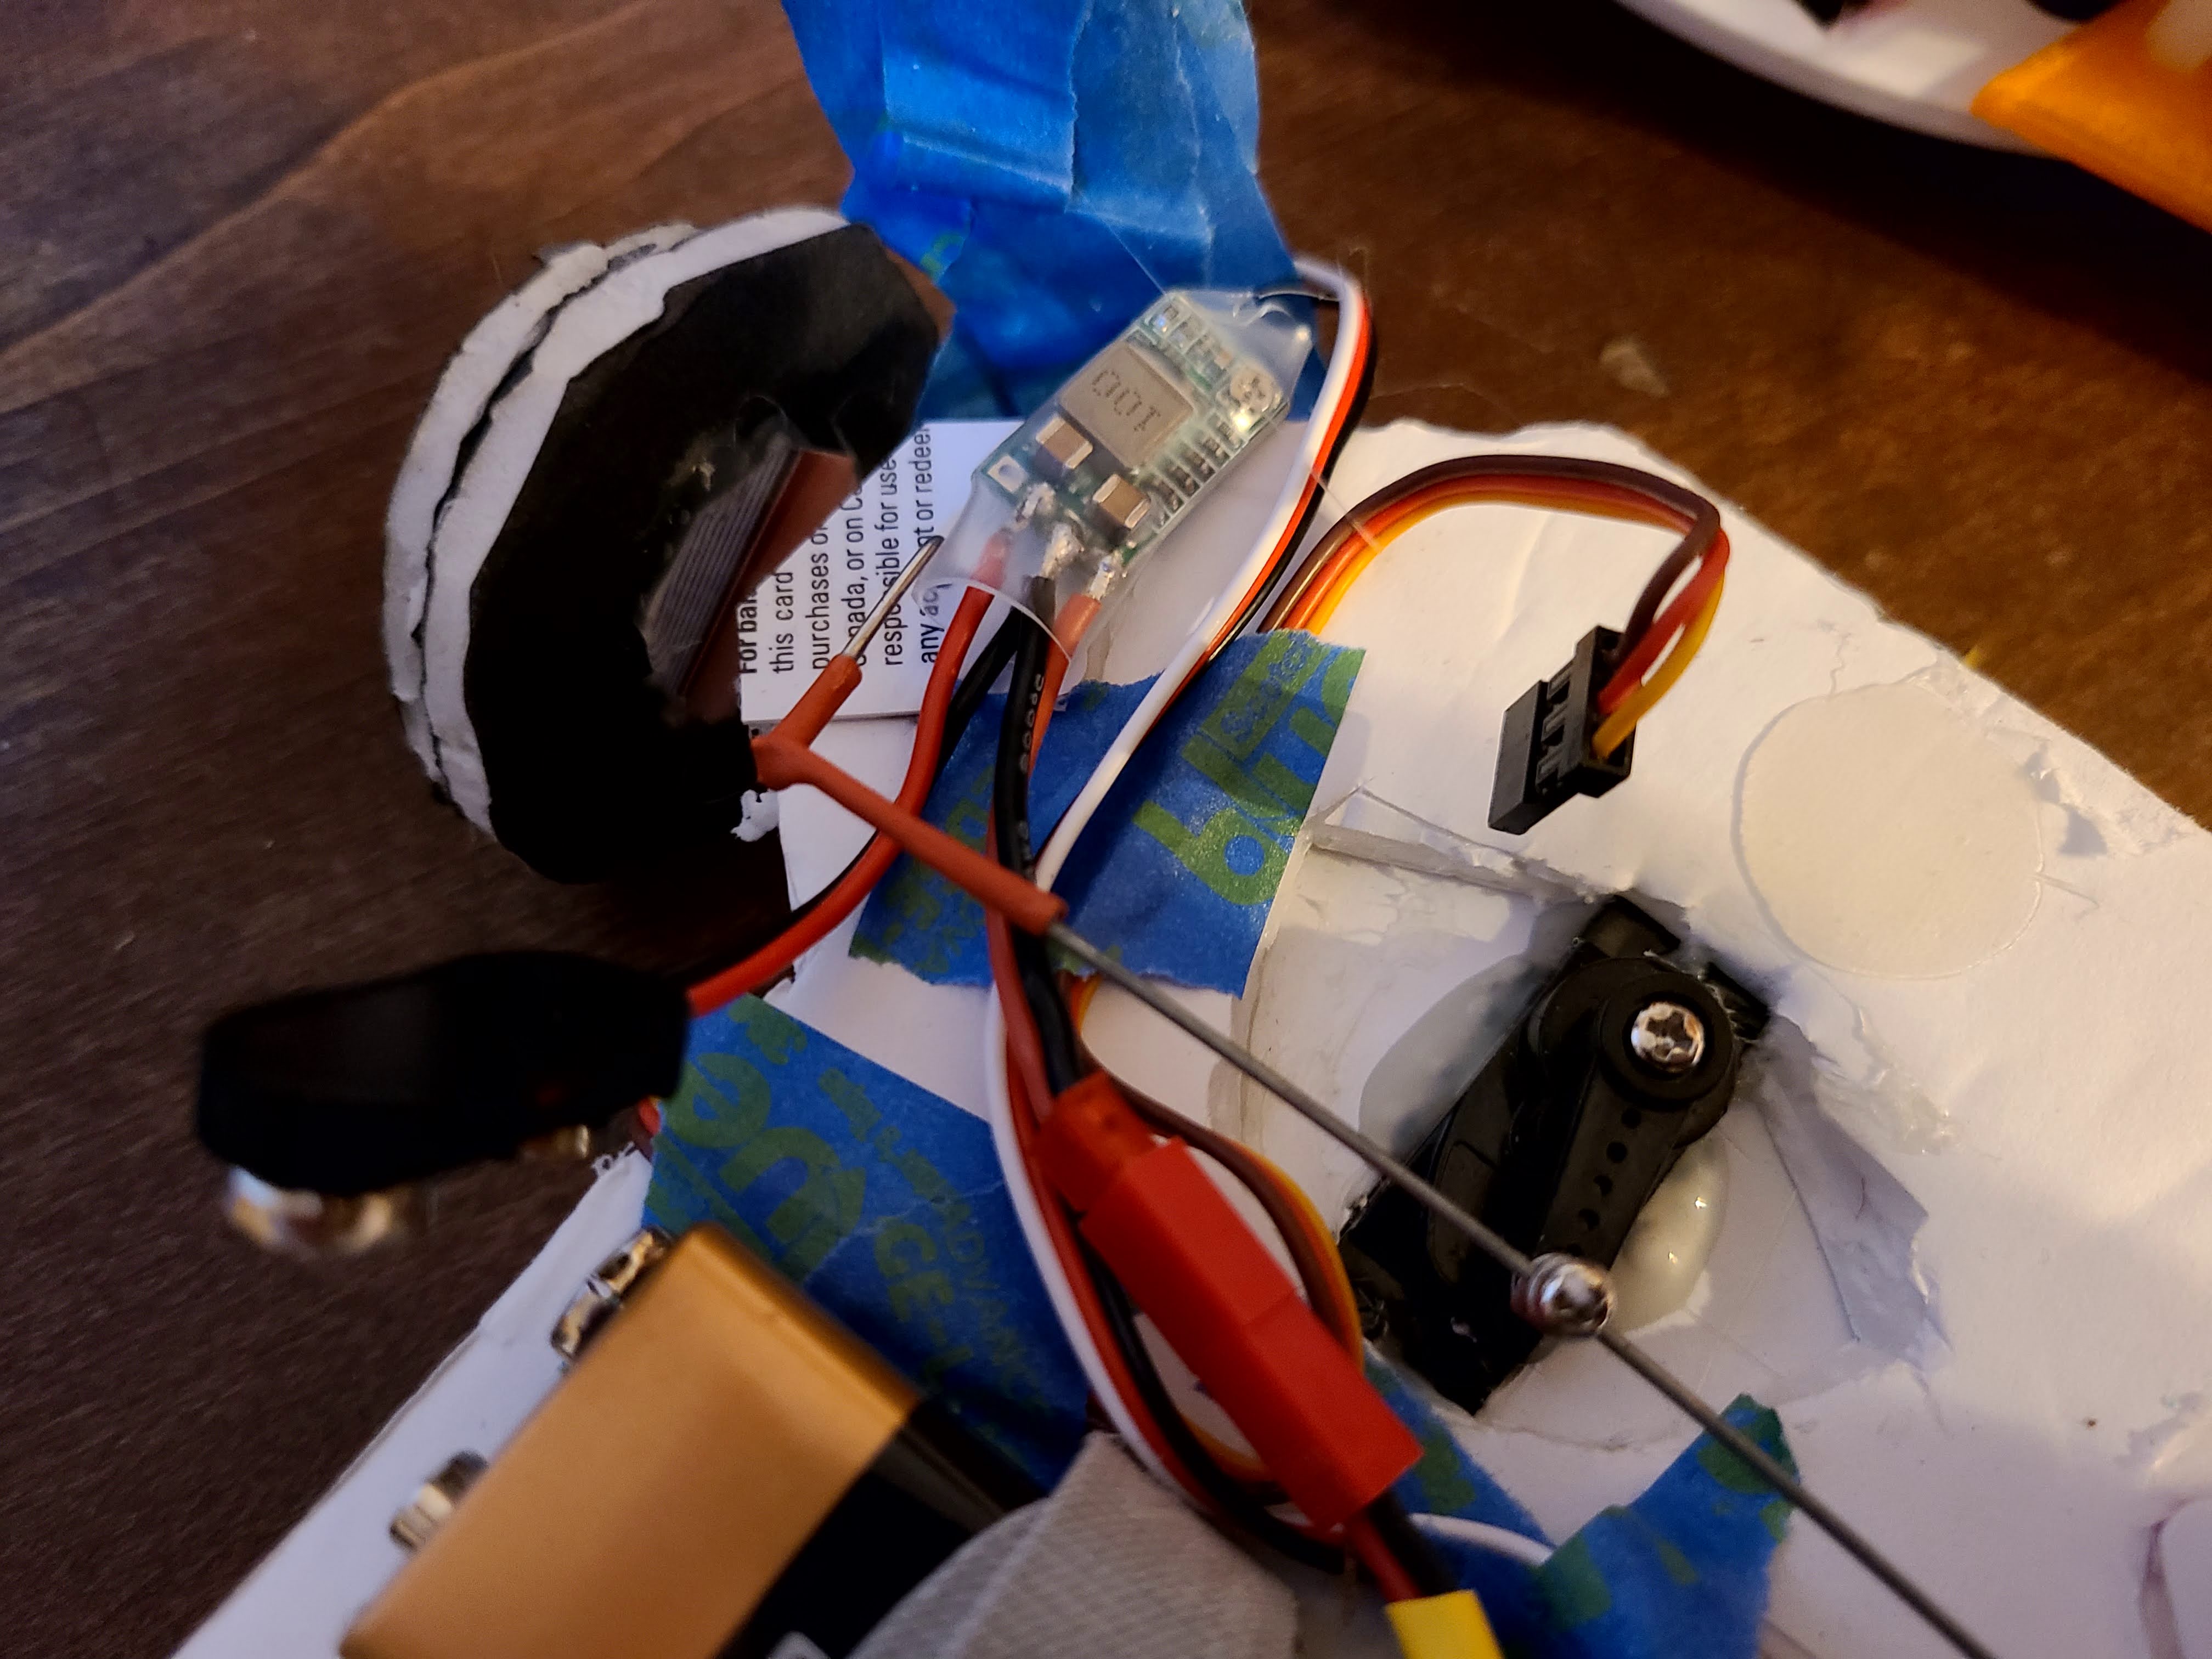
| 1 | 30A 4-8V Brushed ESC Forward Reverse Brake Dual Way | $1 |
| 1 | Mini DC 12-24V To 5V 3A Step Down Power Supply Module (set to 5V) | $3 |
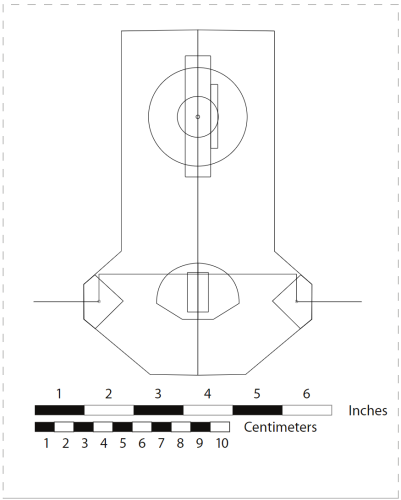
PDF Template
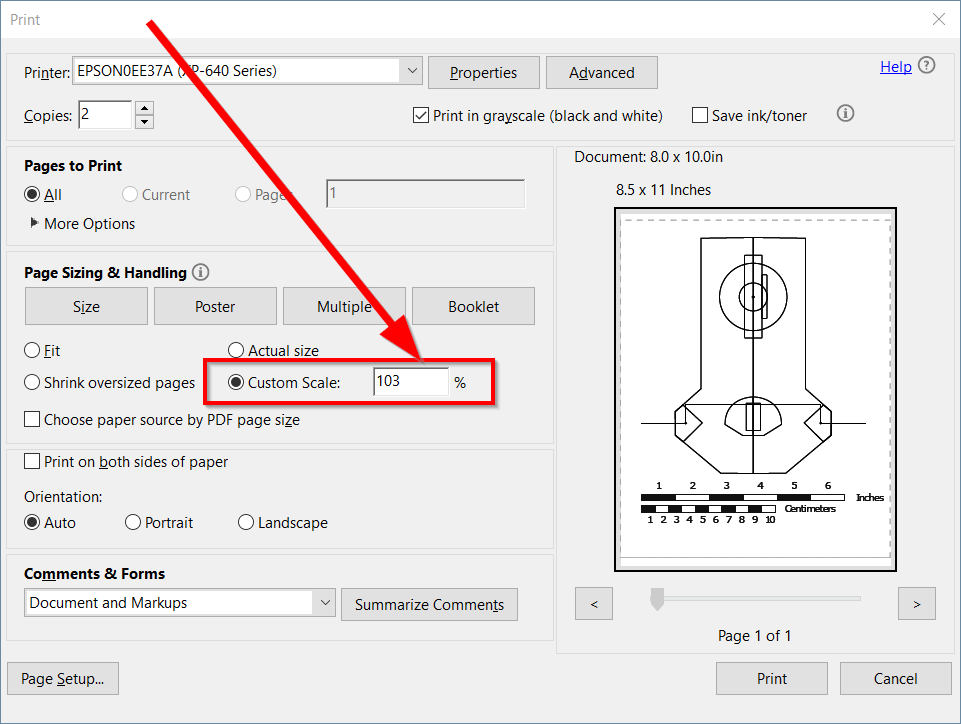
Printing Instructions
The PDF Template below should be printed using Adobe Reader and settings similar to the following. Check the scale on the physical print using a ruler and tweak the "Custom Scale %" as necessary. Consider printing multiple copies since all of the parts are stacked into one template.
Download
Click on the image below to view the PDF file.